 If you’ve been reading this blog for a while, you know that Canva is our favorite design tool. It comes with a ton of templates and images you can use to make printable or POD products. What you might not know is that you can also use it to create digital templates to sell.
Best of all, it’s super easy to do and you can learn how to do it in just a few minutes—and then you can start making your own templates to sell online. Here’s my quick start guide to get you going.
What Are Digital Templates?
 Simply stated, digital templates are blueprints that anybody can use to create products, including digital products, printables, and print on demand items. They provide a layout and basic framework that someone can buy and then personalize with their own ideas, images, and design flourishes.
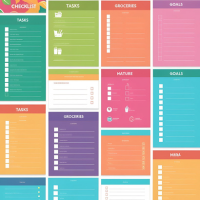
These products are consistently popular. In fact, a quick search on Etsy reveals that there are thousands upon thousands of templates for sale. Here are just a few categories that are popular.
- Greeting cards
- Planner pages
- Calendars
- Invitations
- Place settings
- Social media posts
- Ads
- Business cards
- Worksheets
- Checklists
You can create a template for any one of these items with just a few clicks on Canva. Keep reading to learn how!
How to Create Templates with Canva
It’s extremely easy to create templates with Canva. I’ll walk you through the entire process, from setting up an account to exporting your first template.
Step 1: Create a Canva Account
 You can create a Canva account from their website or on the mobile app. If you want to use the mobile app, you’ll need to install it first. Then, follow these steps.
- Click “Create Account”
- Enter a valid email address or log in with Google or Facebook if you prefer
- Create a password if you plan to log in with your email
- If you use your email address, look for a confirmation email and click the link to verify your account
- Choose the Pro account and enter your payment information
While there’s a lot you can do with Canva’s free account, you really need a Pro account to be able to design templates to sell. If you’re a new user, you can get a free one-month trial.
#2: Decide Which Product to Design
 The second step is to decide what kind of template to design. Start by clicking “Create a Design” in the upper right-hand corner of the page. You’ll get a selection of options, including things like Whiteboard, Instagram Story, or Facebook Cover Image. You also have the option to search for exactly what you want if it’s not provided on the list.
Once you select a product, you’ll see a selection of pre-set templates. You have the choice of using one of these or designing from scratch. For your first template, you may want to start with one of the options provided to take some of the guesswork out of the equation.
#3: Use Canva’s Drag-and-Drop Technology to Create Your Template
For our third step, it’s time for the fun part: designing your very first template.
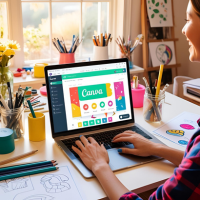 Canva uses drag-and-drop technology. You’ll see a selection of design options on the left-hand side of the page, including colors, fonts, text boxes, images, and a bunch of other things. You can use any or all of them in your design.
All you need to do is click a design element to add it to your template. You can move it around using your mouse or touch pad. For example, if you add a text box, you can personalize it like this:
- Draw the text box using your mouse or touch pad
- Drag the corners of the box to resize it
- Use your mouse or touch pad to place it within the template
- Click inside of it to add text
- Choose a font and type your content
- Change the font size at the top of the template
You can use the same basic method to add a background color or design, add images, or add additional text boxes. For example, if you were making a party invitation, you could create separate text boxes for:
- The event information, including date and time
- RSVP information
- Attire
The wonderful thing about designing a template is that you can make it whatever you want it to be. It’s easy to change the elements around. Your first template may take a bit longer if you’ve never used Canva before, but once you’re accustomed to how it works, you can make a new template in just a few minutes!
#4: Publish Your Template
 You’ll need to publish your template after you’ve created it. Publishing it doesn’t mean you need to make it public. You can create a folder, then use the privacy settings to make it accessible only to you, to you and a team member, or to the public.
We strongly recommend keeping your files private if you plan to create templates to sell. People who use Canva casually might be willing to share their templates with others, but you’re under no obligation to do that.
#5: Export Your Template
 After you’ve saved your template to a folder, you can open it, edit it if you need to, and export it. You can export it by clicking “Export” on the menu.
Next, choose a file type. I like SVG files or PNG files, because they’re easy to resize. That means if you make a template for a sticker and want to size it up to use on a Yeti cup or laptop, you can do it easily.
#6: List Your Template for Sale
 The last step is to list your template for sale. If you’ve already got an Etsy shop, it’s easy to list it there. Just make sure to use all your available hashtags and keywords in your title and description to make your template easy to find.
Keep in mind that a lot of Etsy sellers bundle templates, and you may want to do that too. Bundles make shoppers feel like they’re getting a bargain, and they can help increase your sales!
Do you need some help creating and selling Canva templates? Check out Canva Cashflow – Professional Templates Made Easy, my complete guide with done-for-you templates and much more!


