 Wall art provides people with an easy way to personalize their living space or office. Printable or print on demand art is easy to create, requires no artistic training, and can be sold many times. In other words, the earning potential is truly limitless!
One of our favorite things about artificial intelligence (AI) powered tools is that they can be used to streamline and speed the process of creating digital art. You don’t need to have artistic training or a graphic design degree to do it because AI will follow your instructions and create whatever you want. We’ve put together this guide to walk you through the process.
Choose the Right Tools
The first step is to choose the right tools to make wall art. Here are a few that are particularly good.
 Artsmart was rated the number one AI art-creation tool by Techopedia and it’s easy to see why. You can use word or image prompts and it will give you high-definition artwork that’s really spectacular. The cost is $16/month for their basic plan, which gives you 1,000 “playground credits” to create artwork. The downside is that there’s no free trial.
- Neuroflash is an alternative to Artsmart and it’s ideal for beginners. It comes bundled with another tool, ContentFlash, that can create written content. Prices start at $30/month, but there’s a free trial so you can test it out before you commit.
- DeepArtEffects is a free tool that you can use from your browser or by downloading the desktop or mobile app. We like that it makes it easy to create images in batches based on your specifications. There’s a free demo available and plans start at $9.99 per month.
We suggest poking around a bit and seeing which features appeal to you the most before making a commitment.
Come Up with a Prompt
 Good prompts are at the heart of every type of content created with artificial intelligence. The most important thing to remember is that your AI-generated images are only going to be as good as what you give the AI tool to use.
In many cases, you’ll have the option between providing a verbal prompt or a visual one. If you go with a verbal prompt, be as specific as you can. Here’s an example of a prompt that’s not specific enough.
A bridge covered in snow
A prompt like this could work if you don’t care what kind of bridge it is or how much snow is there. You might get an image of a city bridge made of steel with cars on it or a tiny footbridge going over a stream. In most cases, you’ll want to provide a little more information. Here’s an example of a better prompt.
An old-fashioned covered bridge with snow piled high and a horse-drawn buggy driving across it.
Using a specific prompt will ensure that you get as close as possible to the result you want. If you choose an image-based prompt, it may be even easier to convey your desires. The AI tool you choose will analyze the image and create your artwork based on it.
Refine Your Image
 After you get your initial image generated, it’s a virtual certainty that you’ll need to do some refining to get it to where you want it to be. The easiest way to improve your image is by refining the prompt and regenerating the image.
Here are some of the things you might want to add to your prompt using the example above.
- The color of the bridge
- The size of the bridge
- The amount of snow
- The time of day
- Additional features in the image, for example a horse-drawn buggy or a river below
- A style for the image, such as the style of an artist like Vincent Van Gogh or Frida Kahlo
It may take several tries to get the image to the point where you’re ready to start editing.
Edit Your Image
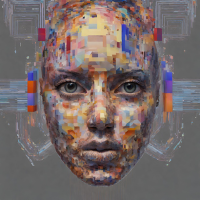 After the AI art generation tool you use has done its job, it’s time to put your distinctive touch on the image you’ve created. Many AI imaging tools come with editing tools as well. That means you can manipulate the image in a variety of ways.
- Cropping the image
- Adding effects
- Removing elements
- Adding text
- Adding a border
Here again, it’s important to take your time and think about what you want from your final image. You can use paid editing software, too. Adobe is an example and using it would give you access to a full suite of image editing features.
Format Your Image Properly
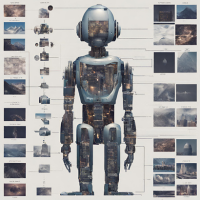 When your image is exactly how you want it, the next step is to save it in a format that allows your customers to choose the size they want. For this purpose, you’ll want an image format that’s based on vectors and not pixels. Vector image formats make it easy to scale images up or down without losing definition.
Some of the most popular vector formats include TIFF, PNG, and EPS formats, in that order. Another benefit of using a vector format is that you can make the image once and sell it many times at any size. If you’re bundling images, remember that there may be an advantage to saving different size images as separate files to make your product seem as valuable as possible.
Prepare to Sell Your Printable Wall Art
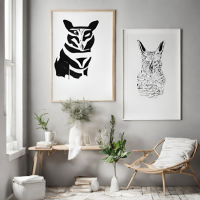 The final step is all about selling your printable wall art. Some wall art may be small and easy for people to print at home. If that’s the case, you’ll need to prepare printing instructions to make sure your customers get the best possible results.
If you want to sell large-scale artwork, you’ll need to link your online printable shop to a print on demand (POD) service that can do the printing on behalf of your clients. The benefit of choosing POD is that it gives you more opportunities to sell your artwork by appealing to people who have a lot of wall space to fill.
Create Wall Art in a Few Simple Steps
Creating wall art is not difficult. We hope that the simple process we’ve outlined here will inspire you to get started and see how easy it is to do—and how much money you can earn! Once you pick a tool to use, the rest is simple.
Do you need some help getting started creating wall prints with AI? Check out Easy AI Trendy Wall Prints, which includes tips about the best free AI tools to use, which wall art trends are booming, and much more!

